Welcome to Bepa's Garden!
This blog is about organic gardening, healthy eating and healthy living.
Each month I will be posting Garden To-Do Lists, Tips & Techniques, Garden Project Plans, Photos from the Garden, Recipes and Book Reviews.
I hope you enjoy reading and I hope I can inspire others to start a backyard garden!
Happy Gardening!
~Rob~

Pages

Wednesday, October 30, 2013

Sweet Corn - From Seed to Seed...


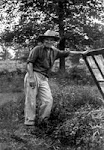
One of my most favorite crops to grow this year was the sweet corn.

We had been trying to grow corn successfully for several seasons, but haven't had the best of luck. It was getting harder and harder to find organic, non-gmo seed, and when we were able to, and planted some, our seedlings were either devoured by crows or raccoons.

This year we decided to plant corn in the school garden. We purchased seed from 1840 Farm's Heirloom Seed Collection and had the children from one of our after school garden clubs plant the seeds on May 30th.


We weren't sure how well the corn would grow because this was the first year growing the garden. The beds were freshly dug and only amended with a few inches of aged horse manure, but to our surprise the corn started sending up shoots in just 5 days!


 The corn continued to grow and within a month it was surely knee high by July!


We just watered and weeded through the summer and were amazed by how fast the corn was growing.


By the end of July the corn was over 7 feet tall and was starting to form ears and tassels. 


The stalks were unbelievably thick with roots that looked like fingers, holding it to the ground as it reached for the sky.


On August 25th were were harvesting the first ears of corn, roughly 3 months after planting it. The corn was so sweet and tender most of it was eaten raw right there!


We managed to save a few ears from being devoured right there and were able to give some to the families that helped with the garden.


We also left some on the stalks to dry so we could save the seeds for next years planting. When the corn was completely dry, and the kernels easily popped out, we picked it and saved the seeds. The dried stalks were donated to the school to use as decorations for the Halloween festival.


I was thrilled to have had such success growing corn, and the taste was so much sweeter than anything we have ever purchased at the grocery store. We now have over 200 seeds to plant in the school garden and in our own garden next year and we plan to save much more seed next time.

This was my first success growing corn and saving the seed. It was actually pretty easy to do and I look forward to saving seeds from more varieties each year. 
My wife often jokes that I have millions of seeds stashed in paper bags and envelopes throughout my office. The scary thing is she is probably right, but there are reasons to my obsession (or madness). I want to be able to save enough seeds so we can donate them to other school gardens just starting out. I also want give some to school families so they can garden at home, and sell some to raise money to help support the school garden. I think by next year we will have enough seeds saved to do all this!

~Rob~

Monday, October 28, 2013

Organizing and storing seed


Now that the growing season if officially over, after having been hit with our first frost, it is time to start sorting through the numerous paper bags, cups and envelopes full of seed I saved throughout the year and organize them for the next growing season.

 
Seed saving is as exciting to me as the growing of the crops. It will never cease to amaze me how many seeds can come from a single flower or fruit, and just how easy it is to save them for next season's garden. As you can probably tell, saving seeds has become a bit of an obsession for me. 

This year I saved seeds from some new varieties like Stowell's Evergreen Sweet Corn,  Black Hungarian Peppers, Bell Peppers, Purple Tomatillos, Good Mother Stoddard Pole Beans, Thai Basil. I also saved seeds from some of our flowers including, Marigolds, Sunflower, Zinnia, Morning Glory, Heliotrope, Dahlia, Petunia and Wild Iris.


Over the years it has been harder and harder to find organic corn, so I was excited to successfully grow and save seeds from this heirloom variety. We now have 150 seeds to plant for next year!


 Although I wasn't able to grow as many beans as I would have liked, I was able to grow enough for seed. I am looking forward to planting these next year.


 A favorite herb we often like to cook with, and is hard for us to find, is Thai basil. This summer I grew several plants and successfully saved hundreds of seeds. We are planning an extensive herb garden next year, so hopefully I will now have a steady supply of seeds.

For the smaller seeds, I use glassine envelopes to store them in, which can be purchased from Seed Savers Exchange.

If you want to learn more about saving seeds you can check out some of my earlier posts about saving basil seeds and making your own seed envelopes like the ones pictured above.

There are several books available that walk you through the steps of saving seeds for each variety, with my favorite being Seed to Seed by Suzanne Ashworth.

One of the many books on my winter reading list this year is The Organic Seed Grower by John Navazio.


 We are working towards saving almost all of our own seeds so we don't have to purchase them each year. We have been pretty successful so far and now only buy seeds for new varieties that we want to try and potentially add to our seed saving project.

There have been far more successes than failures, the latest being not harvesting the lettuce seed before the rain and it ended up getting too wet and molding, but there is always next season to try again!

Do you save your own seeds, if so what varieties do you have the best success with?

~Rob~

Friday, October 18, 2013

Searching for farmland...


In the past couple of weeks I have decided to take the leap to start seriously looking for land to farm on. I have signed up with the Connecticut FarmLink Program and New England Landlink through the New England Small Farm Institute to try and locate farm land to either rent or buy.


Last week I looked at a potential property, a one acre flower farm about a half hour away. The farm is home to a thriving flower business, with the potential to expand to other crops. I met a very nice woman who runs the business and ended up working with her yesterday, helping to clear the gardens preparing them for winter. What better way to get a feel for a farm than to spend a few hours working in the gardens. This property may not be ideal for my particular visions of farming but it definitely has possibilities. If anything I got a chance to meet a fellow grower and may end up working with her part-time, learning more about her business.

In my search for farmland I have come across a very useful tool to help locate farm-able land, Web Soil Survey.

Web Soil Survey is a website that provides soil data and information provided by the National Cooperative Soil Survey and is operated by the USDA Natural Resource Conservation Service (NRCS). It is very easy to use, you just enter in the address of the property, use the AOI (area of interest) tool to draw the boundary of the property, and click the soil map tab to get a soil report.
When I entered my current property the report read: 

Soil Type: Agawam fine sand loam
Farmland classification: All areas are prime farmland

The report is lengthy, as well as soil types and farmland classification it gives you components of soil type, properties and qualities, profile, drainage, flood zone, and a lot of other very useful information. It is a great tool to use to quickly eliminate properties that aren't really good for farming.

Ideally we would love to move to Vermont, but with my business, my wife's job and our kid's still in school, it may not be the most practical thing to do just yet. The dream of living on a 10 acre New England farm is very appealing to all of us, but when the thought of uprooting our comfortable lives becomes a real possibility, it becomes a little daunting, so the new plan is to find local land to start farming on now.


My ideal farm plan is to operate a small 5+ acre organic market farm, selling through an onsite farm stand and to local markets and restaurants. Getting my feet wet (or dirty) in actually running a farming business is a priority to help gain experience before I take the big plunge. Gardening at home and managing the school gardens are fulfilling, but it's not the same as  running an actual farm business. We do have plans in the works to expand the gardens on our current property, add an additional greenhouse and talk to the town about getting a license to sell at farmer's markets. I am already licensed to run an in-home business so I don't foresee any potential issues.


I am in the midst of reading, Market Farming Success, which is full of great ideas and inspirations, and am a subscriber to Growing for Market which is loaded with very informative articles and publications on market farming. These publications confirm that the potential exists for market farmers to be very successful, especially with so many people wanting to eat healthier these days.
 
I have so many notebooks full of ideas for my farm business and have mapped out several enterprises that I would love to try my hand at once we find farmland.  The big plan is still to purchase our forever home, that New England Farmhouse with enough land to farm on, room for a few greenhouses, and a roadside stand to sell fresh organic vegetables and cut flowers, but in the meantime I will be happy farming on an acre or two to get some experience under my belt and start doing what I dream about doing every day!

~Rob~


Friday, October 4, 2013

Growing a Winter Garden


Mother Nature has thrown us yet another curve ball with warmer than normal fall temperatures here in New England, but as a gardener you can use this to your advantage to start a winter garden. 


I have come to appreciate walking out into may garden to pick fresh kale, lettuce and other salad greens all summer as opposed to the tasteless and often bitter greens you often get from the grocery store, and just because summer is over it doesn't mean that supply of fresh greens has to end.

There is nothing like going out to your garden in the middle of January to harvest fresh lettuce, greens, radishes, and carrots for a salad. The cold tolerant veggies are easier to grow in late fall and winter because you don't have to water as much, the problem of pests is virtually eliminated, and the veggies taste even sweeter because of the colder temperatures! 


Winter growing is extremely easy to do, and is quite possible even here in the North East with cold winter temperatures and an abundance of snow. To be successful you need to do a little planning which I have written about in Planning a Fall Garden. You need to choose cold hardy varieties of arugula, celery, endive, leeks, lettuce, parsley, radish, scallions, spinach, swiss chard, carrots, kohlrabi, mache, radicchio and kale and start them early enough to be established before the cold weather hits. As soon as it starts getting colder, the plants growth will continue, but at a much slower rate. You will also need to protect your plants from frost and snow by using row covers, hoop houses or cold-frames (mini-greenhouses).


I have written several posts about growing a winter garden using min-greenhouses.


Mini-greenhouse are practical, inexpensive and are perfect for those who don't have the room for a greenhouse. They are easy to build, portable and have many uses throughout the year. They can be used for starting seedlings in the spring, starting early tomatoes & peppers, protecting tender plants from wind and harsh weather, hardening off seedlings before planting in the garden, moved to the garden to extend the growing season, and of course to grow a winter garden.

Free downloadable plans to build the mini-greenhouse are available on my Project Plans page.

 I have had such an overwhelming response to my step-by-step greenhouse plans that I have decide to also make available step-by-step plans to build the mini-greenhouses as well. 


The plans include complete step by step instructions as well as materials list, cut lists and templates to build both the 4' x 4' and 4' x 8' mini-greenhouse. They also include plans to build the raised bed system which can be used as the base for the mini-greenhouse.


They are available in my ETSY store in PDF form and will also be available soon as a printed and bound booklet.

Happy Gardening!

~Rob~